> ## Documentation Index
> Fetch the complete documentation index at: https://docs.coderabbit.ai/llms.txt
> Use this file to discover all available pages before exploring further.
# Planning on Linear
> Generate comprehensive Coding Plans from your issues using Linear issue tracker.
export const ProPlusPlanBadge = ({tip = "This feature is available as part of the Pro+ plan and Enterprise plan. Please refer to our pricing page for more information about our plans and features.", title = "Pro+ Plan", cta = "Read more", href = "https://coderabbit.ai/pricing", disabled = false}) => {
return
{title}
;
};
This guide covers issue-based planning with Linear. For the full CodeRabbit Plan documentation, see [CodeRabbit Plan](/plan).
## Prerequisites
Enable the Linear integration as explained in [integrations documentation](/integrations/issue-trackers)
## Initiating Planning
### Manual Planning
Comment `@coderabbitai plan` on any issue to generate a plan.
### Auto-Planning (Recommended)
Navigate to the **Planning** tab in the CodeRabbit web app to configure automatic planning rulesets.
**Configuration via Web UI Only:** Auto-planning rulesets must be configured
through the CodeRabbit web interface. Configuration via `.coderabbit.yaml` is
not supported for this feature.
A ruleset consists of conditions that, when met, automatically trigger plan generation. All conditions are optional—you can use any combination that fits your workflow:
| Condition | Description |
| -------------- | ------------------------------------------------------------ |
| **Issue Type** | Match specific issue types (e.g., Bug, Feature, Task) |
| **Labels** | Match issues with specific labels |
| **Assignee** | Match issues assigned to specific users |
| **Status** | Match issues in specific statuses (e.g., Ready, In Progress) |
You can create multiple rulesets with different combinations of conditions. A plan is triggered when any ruleset matches.
Auto-planning rulesets are configured at the workspace level. When your workspace has multiple CodeRabbit organizations or Linear connections, select the organization and issue tracker **Connection** before choosing repositories or conditions. Each ruleset is saved against the selected Linear connection.
Specifying a repository using the Repository selector ensures plans are
always generated against the correct codebase in the selected organization,
skipping the repository resolution step.
## Repository Resolution
Since Linear issues aren't tied to a specific repository, CodeRabbit needs to determine which repository to analyze when generating a plan.
CodeRabbit attempts to resolve the repository in this order:
If the issue description contains `repository: ` or a link to a repository, CodeRabbit uses that repository.
```markdown theme={null}
repository: my-org/my-repo
OR
repository: https://github.com/my-org/my-repo
```
If a planning ruleset specifies a repository, CodeRabbit uses that repository.
CodeRabbit leverages its deep understanding of your project to intelligently
predict which repository is most relevant.
If CodeRabbit can't confidently determine the repository, it replies to the issue asking you to specify which repository to use. Reply with the repository name to continue planning.
## Viewing and Refining Plans
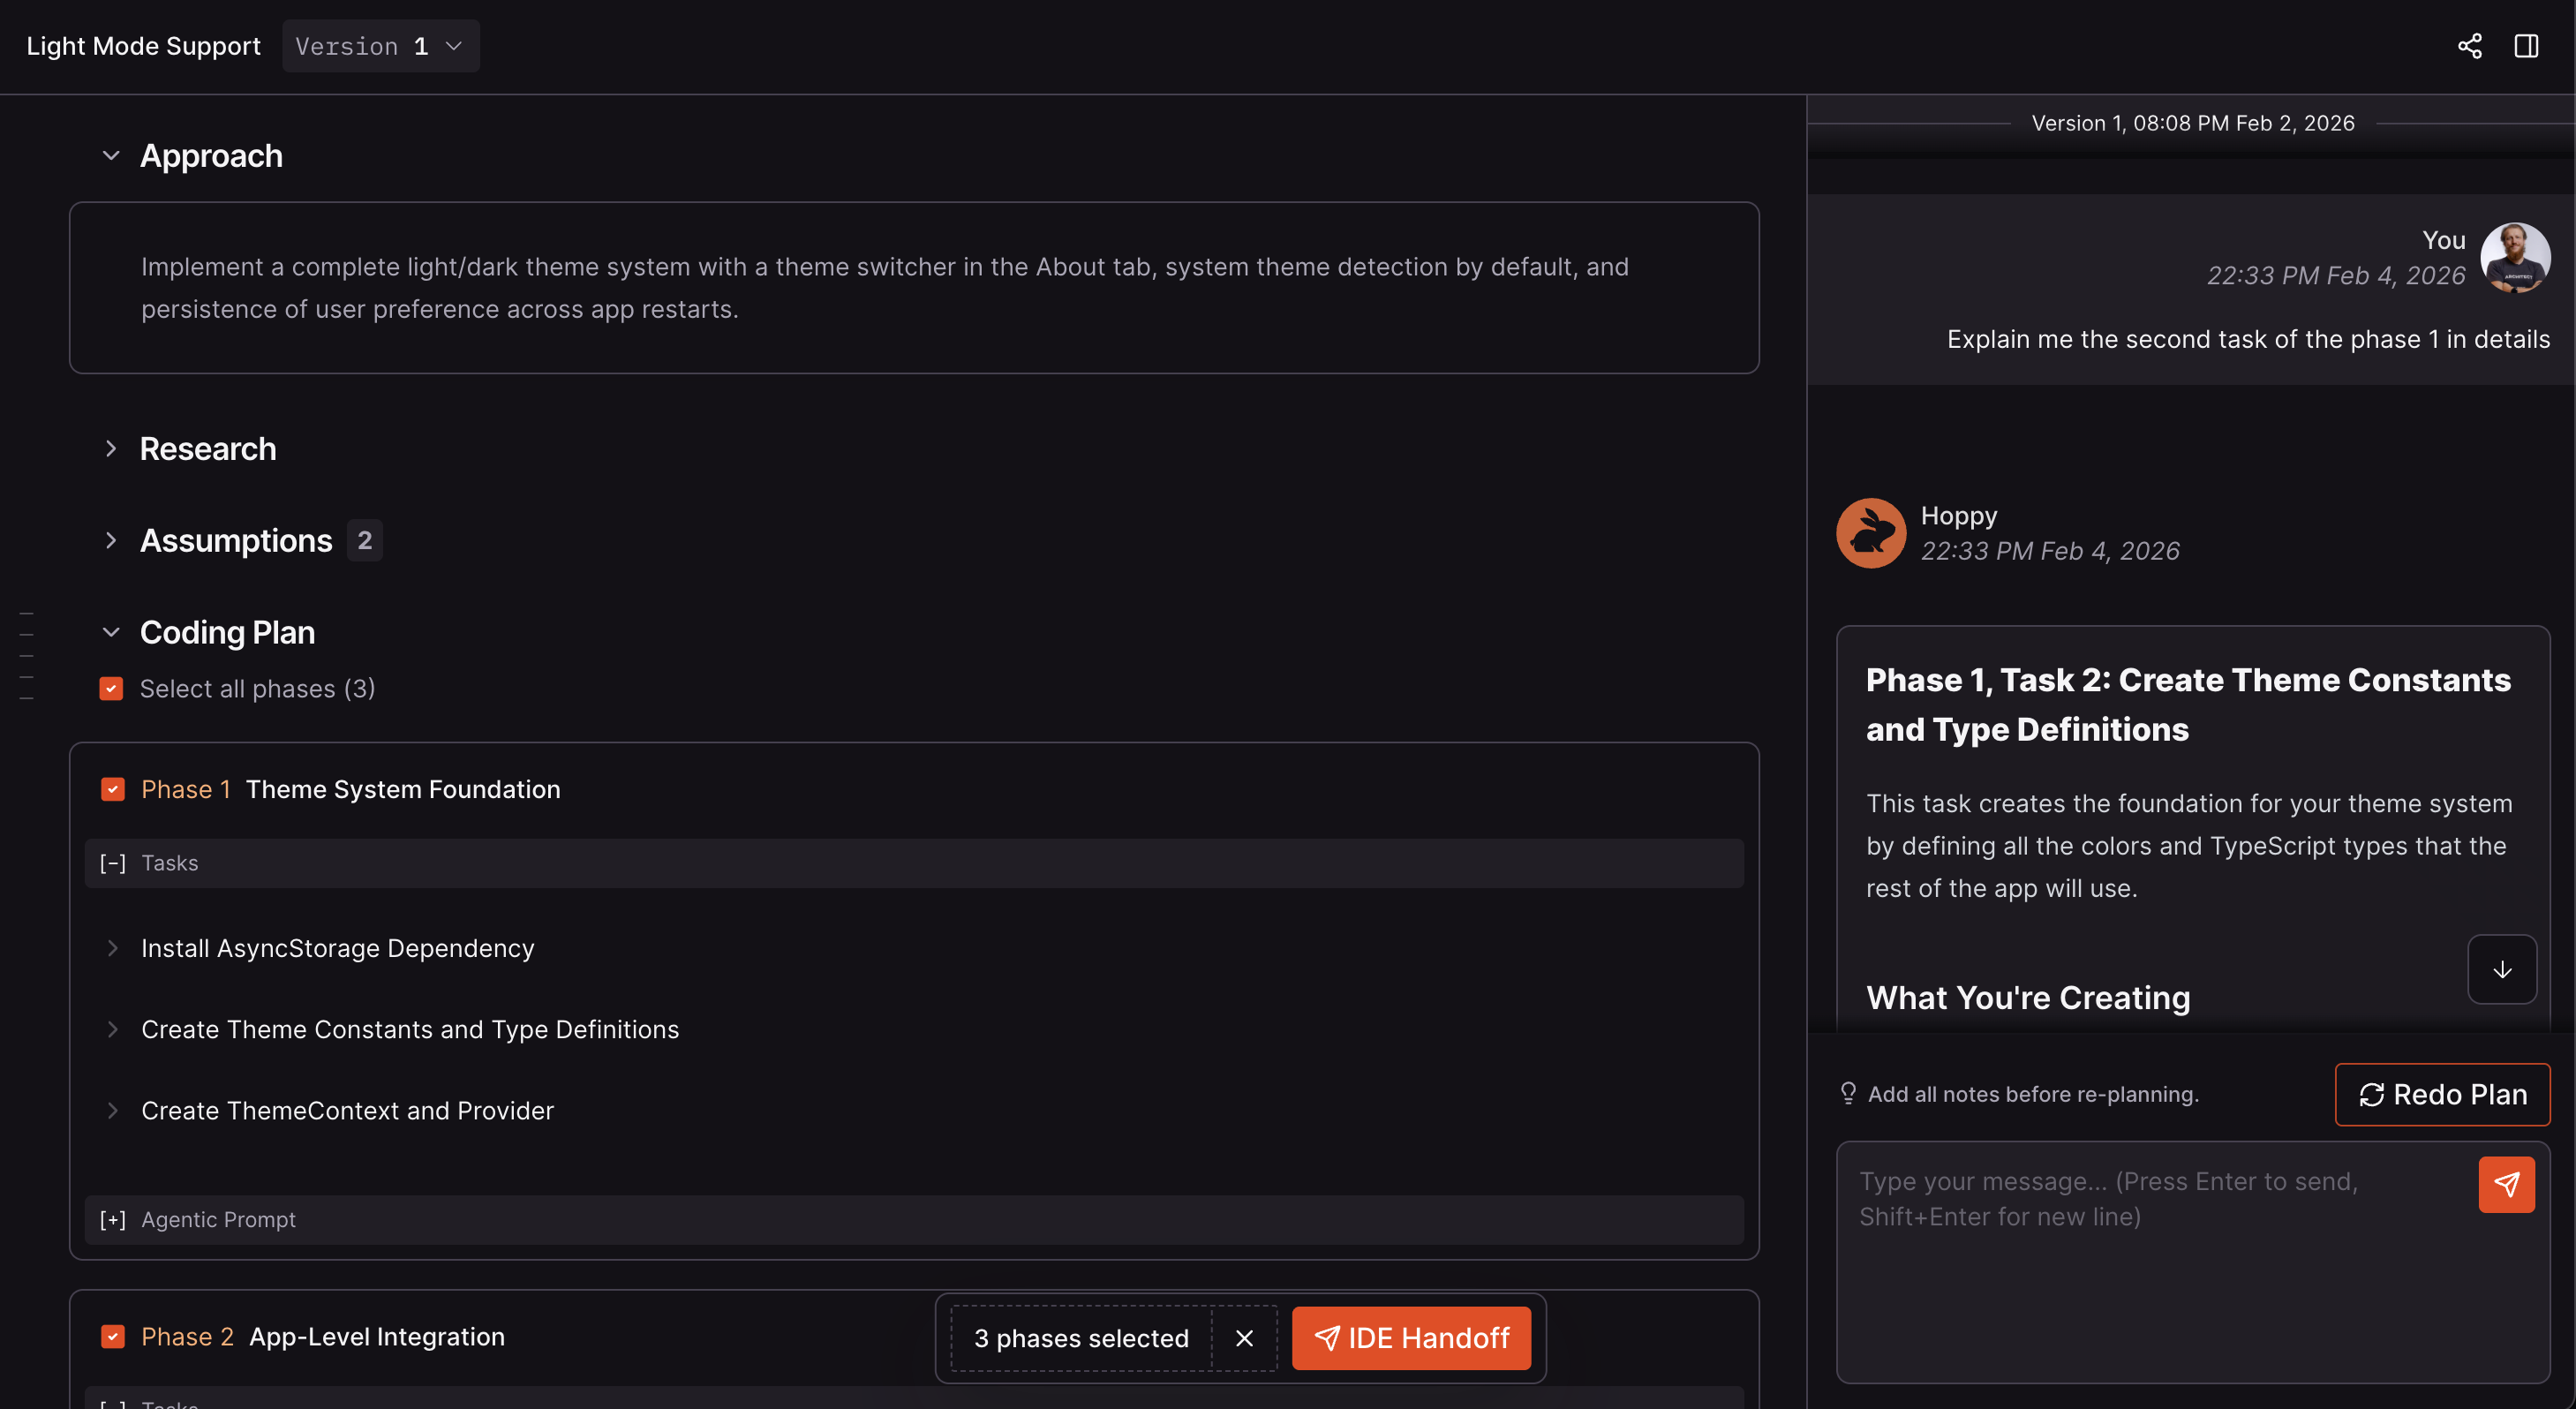
Once a Coding Plan is generated, view it in the CodeRabbit web app. Anyone in your organization can view and work with the plans.
Plans in the web app are organization-specific. If a plan shows a 404 error,
verify you're viewing the correct organization in the CodeRabbit web app.
 ### Chatting about Your Plan
Use the chat panel on the right side of the plan viewer in the CodeRabbit web app to:
* Ask questions about the plan or the codebase
* Request changes to specific tasks or phases
* Challenge design choices and provide additional context
* Get clarification on implementation details
### Re-planning
After providing feedback through chat:
1. Review your feedback in the chat history
2. Click the **Redo** button
3. CodeRabbit generates a new plan version incorporating your feedback
### Version History
Each re-plan creates a new version. Use the version selector at the top of the plan viewer to:
* View previous versions
* Compare what changed between versions
* Revert to an earlier version by marking it as active
You can only chat about the currently active version.
### Handing Off to a Coding Agent
Click the **Handoff** button at the bottom of the plan viewer to see your options:
#### Copy to Clipboard
Copy the agentic prompts to your clipboard, then paste them into your preferred coding agent (Claude Code, Cursor, GitHub Copilot, etc.).
#### IDE Extension
If you have the CodeRabbit IDE extension installed, the Coding Plan can be sent directly to your coding agent through the extension. The agentic prompts appear in your coding agent's input field, ready to execute.
If you don't have the extension installed, you'll be prompted to install it.
### Chatting about Your Plan
Use the chat panel on the right side of the plan viewer in the CodeRabbit web app to:
* Ask questions about the plan or the codebase
* Request changes to specific tasks or phases
* Challenge design choices and provide additional context
* Get clarification on implementation details
### Re-planning
After providing feedback through chat:
1. Review your feedback in the chat history
2. Click the **Redo** button
3. CodeRabbit generates a new plan version incorporating your feedback
### Version History
Each re-plan creates a new version. Use the version selector at the top of the plan viewer to:
* View previous versions
* Compare what changed between versions
* Revert to an earlier version by marking it as active
You can only chat about the currently active version.
### Handing Off to a Coding Agent
Click the **Handoff** button at the bottom of the plan viewer to see your options:
#### Copy to Clipboard
Copy the agentic prompts to your clipboard, then paste them into your preferred coding agent (Claude Code, Cursor, GitHub Copilot, etc.).
#### IDE Extension
If you have the CodeRabbit IDE extension installed, the Coding Plan can be sent directly to your coding agent through the extension. The agentic prompts appear in your coding agent's input field, ready to execute.
If you don't have the extension installed, you'll be prompted to install it.