

Setting up a recurring report
1
Navigate to Recurring Reports
Go to Recurring Reports in the CodeRabbit
dashboard
2
Create new report
Click Create Report
3
Configure settings
Configure the following settings based on your team’s needs
Schedule configuration
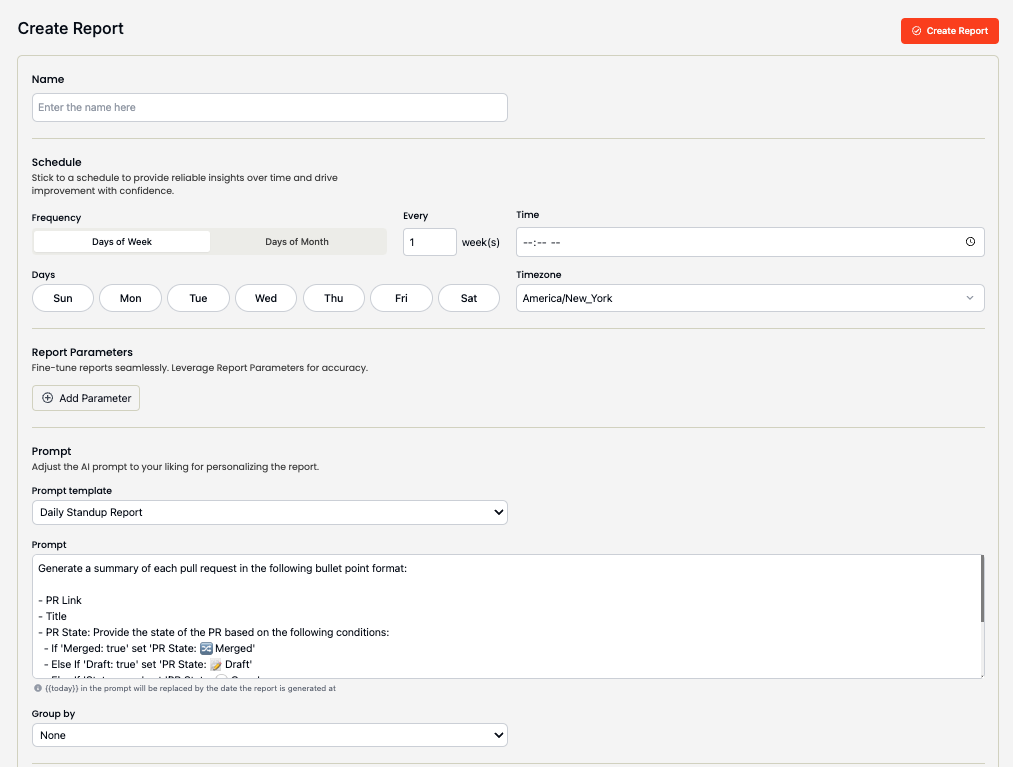
Frequency options
- Days of Week
- Days of Month
- Select any combination of days (Sun-Sat)
- Set frequency (every 1-3 weeks)
- Ideal for weekly team syncs or sprint reviews
Time settings
- Set specific time for report generation
- Choose from comprehensive timezone list (e.g., America/New_York)
- Reports run at the specified time in the selected timezone
Choose a time that works for all team members, especially for distributed
teams across different time zones.
Report parameters
Reports can be filtered using multiple parameters, match pull requests using the IN option and exclude pull requests using the NOT_IN option:Repositories
Select specific repositories to monitor
Labels
Filter by labels with operators:
- IN: Match any selected label
- NOT_IN: Exclude any pr with select label
- ALL: Match all selected labels
Users
Filter by specific users
Teams
Filter by organization teams
Team filtering is not available for GitLab repositories
Each parameter can be:
- Added or removed as needed
- Combined with other parameters for precise filtering
- Modified using different operators
Report content
Reports include comprehensive PR information:PR metadata
PR metadata
- Title and description
- Creation and last activity dates
- Status (merged, mergeable, draft)
- State (open, closed, merged)
Collaboration details
Collaboration details
- Labels and reviewers
- Comments and discussions
- Team associations
Additional context
Additional context
- Repository context
- Author information
PRs are marked as stale after 168 hours (7 days) of inactivity. This helps
identify potential workflow bottlenecks.
Report templates
CodeRabbit offers several built-in templates:Daily Standup Report
A concise summary of pull requests and activities
Sprint Report
A structured overview of sprint goals, completed tasks, in-progress work,
and blockers
Release Notes
A high-level changelog with summary and significant changes
Custom Templates
Create your own format using prompts. Allows for endless customization such
as native language reporting (Japanese, Spanish, French, etc.), custom
formatting, custom titles, and more. Learn more about custom reports
→
Custom Prompt
Communication channels
Configure where your reports will be delivered: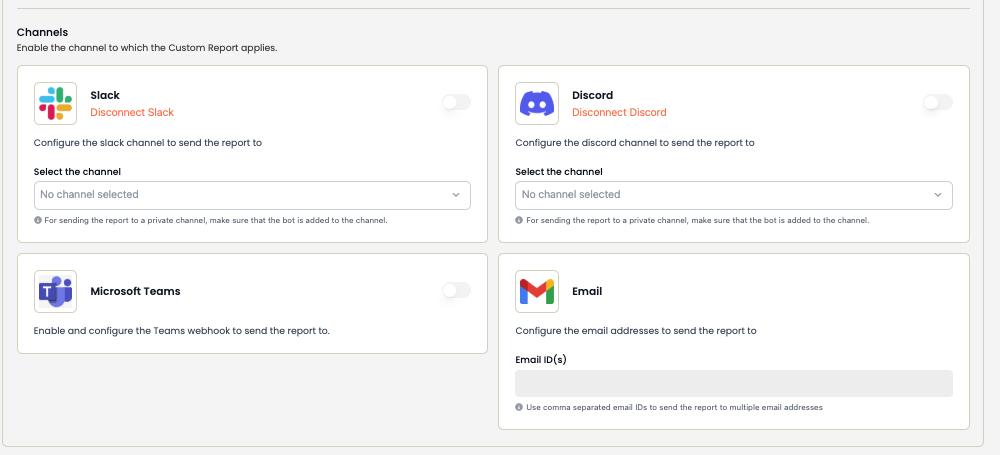
- Email
- Slack/Discord
- Microsoft Teams
- Enter individual email addresses
- Use distribution lists for team-wide delivery
Create separate reports if you need to send to multiple channels with
different formats. Learn more about custom report
formats.
Managing reports
Preview reports
Grouping options
Reports can be organized hierarchically using groups and subgroups:- Primary Grouping
- Subgrouping
Select from these options to organize your main report structure:
- None: No grouping, flat list of items
- Repository: Group by source repository
- Label: Group by PR labels
- Team: Group by team ownership
- User: Group by PR author
Choose grouping options that match your team’s workflow. For example:
- Use Repository → Team for large multi-team organizations
- Use User → Label to track individual contributions by type
- Use Team → Repository to monitor team activity across repos
Report lifecycle management
Control your reports through their entire lifecycle:Editing reports
1
Make changes
Make your desired changes to any configuration settings
2
Save changes
Click the Save button to apply your changes
3
Changes take effect
Changes take effect from the next scheduled run
Remember to click Save when you’re done making changes. Your modifications
will be discarded if you navigate away without saving.
Disabling reports
Toggle the Active switch to temporarily pause a report. Disabled reports:- Maintain their configuration
- Skip scheduled runs
- Can be re-enabled at any time
- Show “Disabled” status in the dashboard
Deleting reports
1
Click delete
Click the Delete button (trash icon) next to the report
2
Confirm deletion
Confirm deletion in the modal
This action is permanent and cannot be undone. All report history and
configuration will be removed.
Best practices
Scheduling
- Align report timing with your team’s workflow
- Consider timezone differences for distributed teams
Content
- Keep prompts focused on actionable information
- Use grouping to improve readability
- Exclude unnecessary details that may create noise
Distribution
- Use channels your team actively monitors
- Consider creating separate reports for different audiences (e.g., management vs. development team)
Related resources
Custom Reports
Create personalized report formats
What’s next
Customize reports
Learn how to create custom report formats and prompts