Before you start
Make sure you have:- A running Keycloak instance and access to its admin console
- A realm to host the CodeRabbit SAML client
- The email domain that should authenticate through CodeRabbit
- A way to reach your account team to request CodeRabbit’s service provider values and submit your final metadata
What CodeRabbit provides
Before you configure the Keycloak client, reach out to your account team to request these values:- Assertion Consumer Service (ACS) URL
- SP Entity ID
What CodeRabbit needs from you
After you configure the Keycloak client, send these items to CodeRabbit:- Email domain: for example,
yourcompany.com - IdP metadata, in one of these forms (listed in order of preference):
- Metadata URL: the realm SAML descriptor URL —
https://<keycloak-host>/realms/<realm-name>/protocol/saml/descriptor - Metadata XML file: download the XML from the URL above and attach it — use this if your Keycloak is not reachable from the public internet
- Manual values, if neither of the above is possible:
- Sign-on URL: the
Locationattribute of theHTTP-POSTSingleSignOnServiceelement in the descriptor - Issuer: the
entityIDattribute of theEntityDescriptorelement (typicallyhttps://<keycloak-host>/realms/<realm-name>) - Signing certificate: the contents of
ds:X509Certificate, saved as a.pemfile
- Sign-on URL: the
- Metadata URL: the realm SAML descriptor URL —
Set up the Keycloak SAML client
Create the SAML client
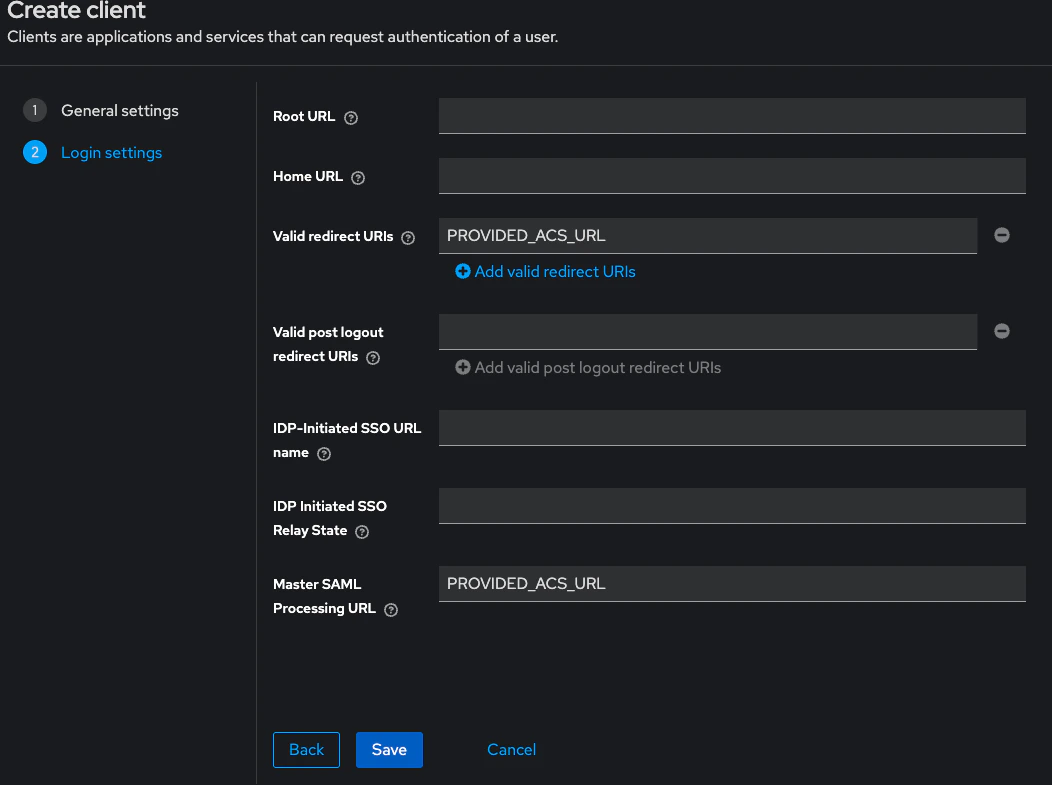
Sign in to the Keycloak admin console, switch into the realm you want to use, then go to Clients -> Create client.On the General Settings screen:
- Client type:
SAML - Client ID: paste the SP Entity ID provided by CodeRabbit
- Name:
CodeRabbit(display-only)
- Valid redirect URIs: paste CodeRabbit’s ACS URL
- Master SAML Processing URL: paste the same ACS URL
- Leave the remaining fields blank.
Tune the SAML settings
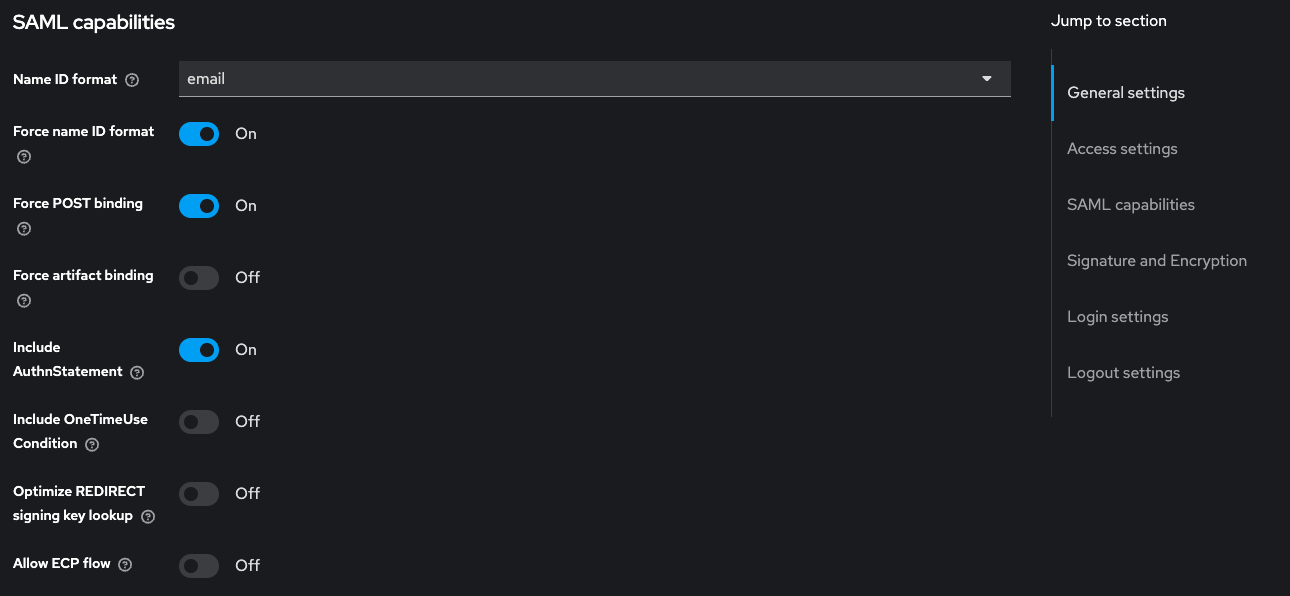
On the client’s Settings tab, set the following values. Defaults for unlisted fields are fine.SAML capabilities

| Field | Value |
|---|---|
| Name ID format | email |
| Force name ID format | On |
| Force POST binding | On |
| Include AuthnStatement | On |
| Field | Value |
|---|---|
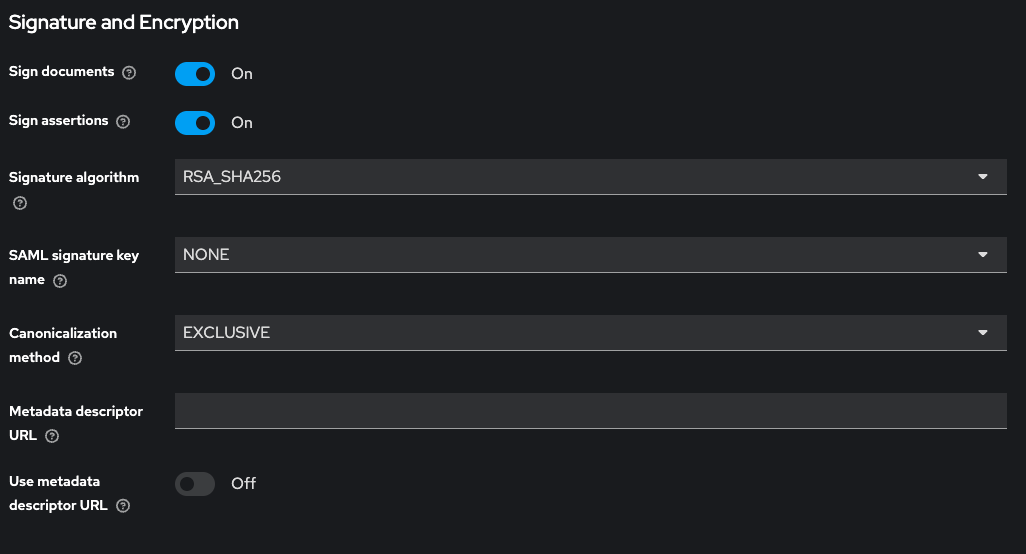
| Sign documents | On |
| Sign assertions | On |
| Signature algorithm | RSA_SHA256 |
Add attribute mappers
CodeRabbit expects email, first name, and last name to be present in the SAML assertion under specific attribute names. Add three mappers so the assertion includes them.Open the client -> Client scopes tab -> click the row whose name ends in
The SAML Attribute Name column is what CodeRabbit reads from the assertion — the values must match the table exactly, including the 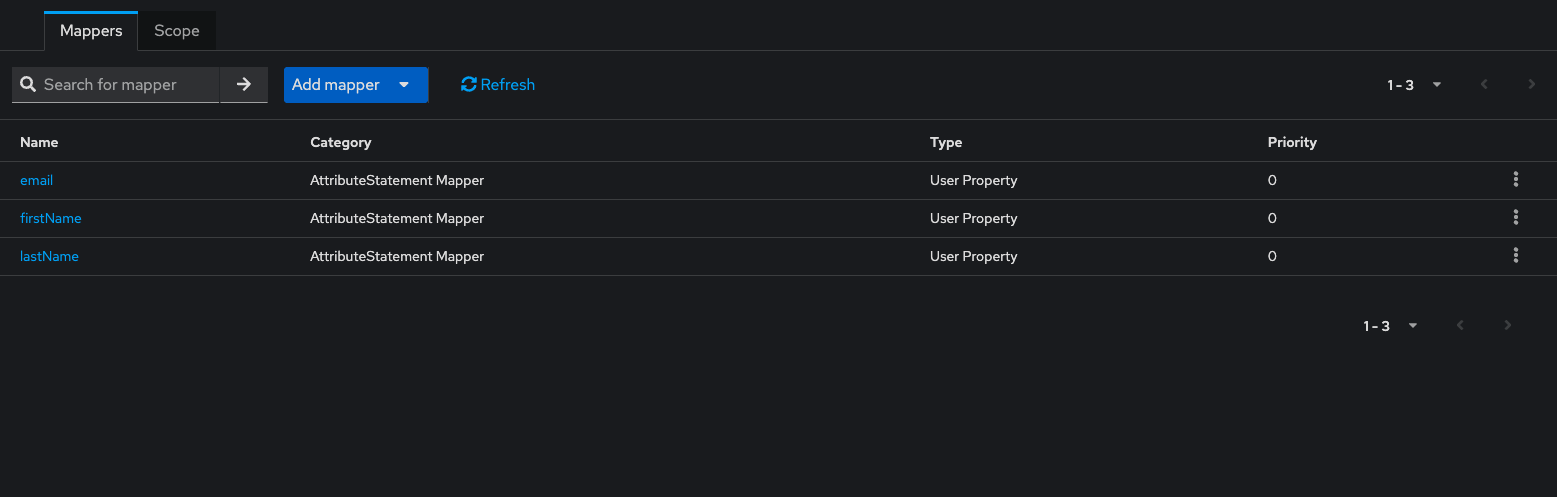
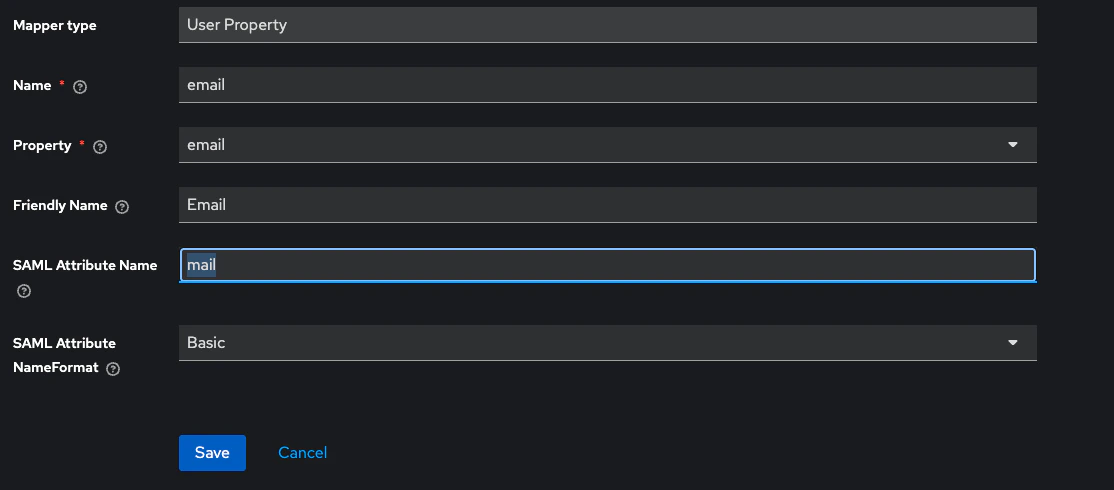
-dedicated (the dedicated client scope) -> switch to the Mappers tab.Click Configure a new mapper -> By configuration -> User Property. Add one mapper per row:| User Property | SAML Attribute Name | SAML Attribute NameFormat | Friendly Name |
|---|---|---|---|
email | mail | Basic | |
firstName | firstName | Basic | First name |
lastName | lastName | Basic | Last name |
mail spelling for email.Grant access to your users
Make sure the users who should sign in to CodeRabbit exist in this realm, with:
- An email that ends in the domain you registered with CodeRabbit
- First name and Last name populated — those flow into CodeRabbit via the mappers above
Send the metadata to CodeRabbit and validate access
Collect your IdP metadata URL:Open it in a browser to sanity-check. You should see an XML
EntityDescriptor containing an IDPSSODescriptor, an HTTP-POST SingleSignOnService endpoint, and a ds:X509Certificate block.Send the following to your account team:- Your organization’s email domain
- The metadata URL above — or, if Keycloak is not reachable publicly, the downloaded XML file or the manual values described in What CodeRabbit needs from you
What’s next
Enterprise SSO overview
Return to the SSO overview to see the shared rollout flow and other supported providers.
Roles and permissions
Pair SSO with the right access controls by reviewing how roles work in your CodeRabbit organization.
Support
Reach out if you need the CodeRabbit service provider values or help troubleshooting the Keycloak setup.