For an overview of how CodeRabbit integrates with Git platforms, see Add CodeRabbit to your repository.For a hands-on tutorial with CodeRabbit performing code reviews on a live repository, see Quickstart.
- Automated code reviews for newly created pull requests
- Intelligent comments and suggestions displayed directly on pull requests
- Real-time bot interaction for immediate feedback and assistance
- Seamless webhook integration for continuous monitoring
To interact with CodeRabbit in pull request comments, use
@coderabbitai — or the username of the service account you configure below, if it differs.Configure API Token
To enable CodeRabbit to interact with your Bitbucket repositories, you need to configure an API token. This token grants the necessary permissions for interacting with the Bitbucket pull request and discussion APIs.1
Create a CodeRabbit service account
Create a new Bitbucket account specifically for CodeRabbit and treat it as a
service account.
2
Configure account settings
- Name the account “CodeRabbit” for easy identification
- Use a dedicated email address for this service account
- If your Bitbucket workspace requires two-step verification, enable it on this account as well
3
Generate API token
Generate an API Token to enable the integration between CodeRabbit and your
Bitbucket repositories.
We recommend creating a dedicated service account and associating it with the
workspace where you want to install CodeRabbit. During the installation
process, CodeRabbit will automatically configure the required webhook for
seamless integration.
If you wish to change the review user, you must provide the API token for the
new user who will post reviews and comments. However, this requires manually
removing the previous user from the projects and associated webhooks. Once
this is done, you will need to reinstall the CodeRabbit app for each project.
Best practices for service account setup
Account Configuration
- Use “CodeRabbit” as the username for easy recognition
- Use a dedicated email address for management
- Use the CodeRabbit logo as the profile picture (download here)
Access Control
- Grant developer access to target projects
- Ensure workspace membership for the service account
- Enable two-factor authentication if required by workspace
Generate an API token
Bitbucket provides an option to generate an API token for your CodeRabbit service account. Follow these steps:1
Log in to your service account
Log in using the user designated for CodeRabbit reviews. This user serves as a service account for managing reviews and related activities.
2
Navigate to API tokens
Go to API
Tokens in your Atlassian account settings.
3
Configure token details
- Enter a recognizable name for this API token (e.g., “CodeRabbit Integration”)
- Set an expiration date based on your security policy
- On the next step, select Bitbucket
4
Select required scopes
Ensure the following scopes are selected for CodeRabbit to function properly:
5
Generate and save token
- Click Create
- Important: Copy and securely store the API token immediately as it will only be displayed once
Configure API token in CodeRabbit
You can provide your API token to CodeRabbit in two ways:- During Installation
- Pre-configure Token
CodeRabbit will automatically prompt you to provide the API token during the repository installation process if none is configured.
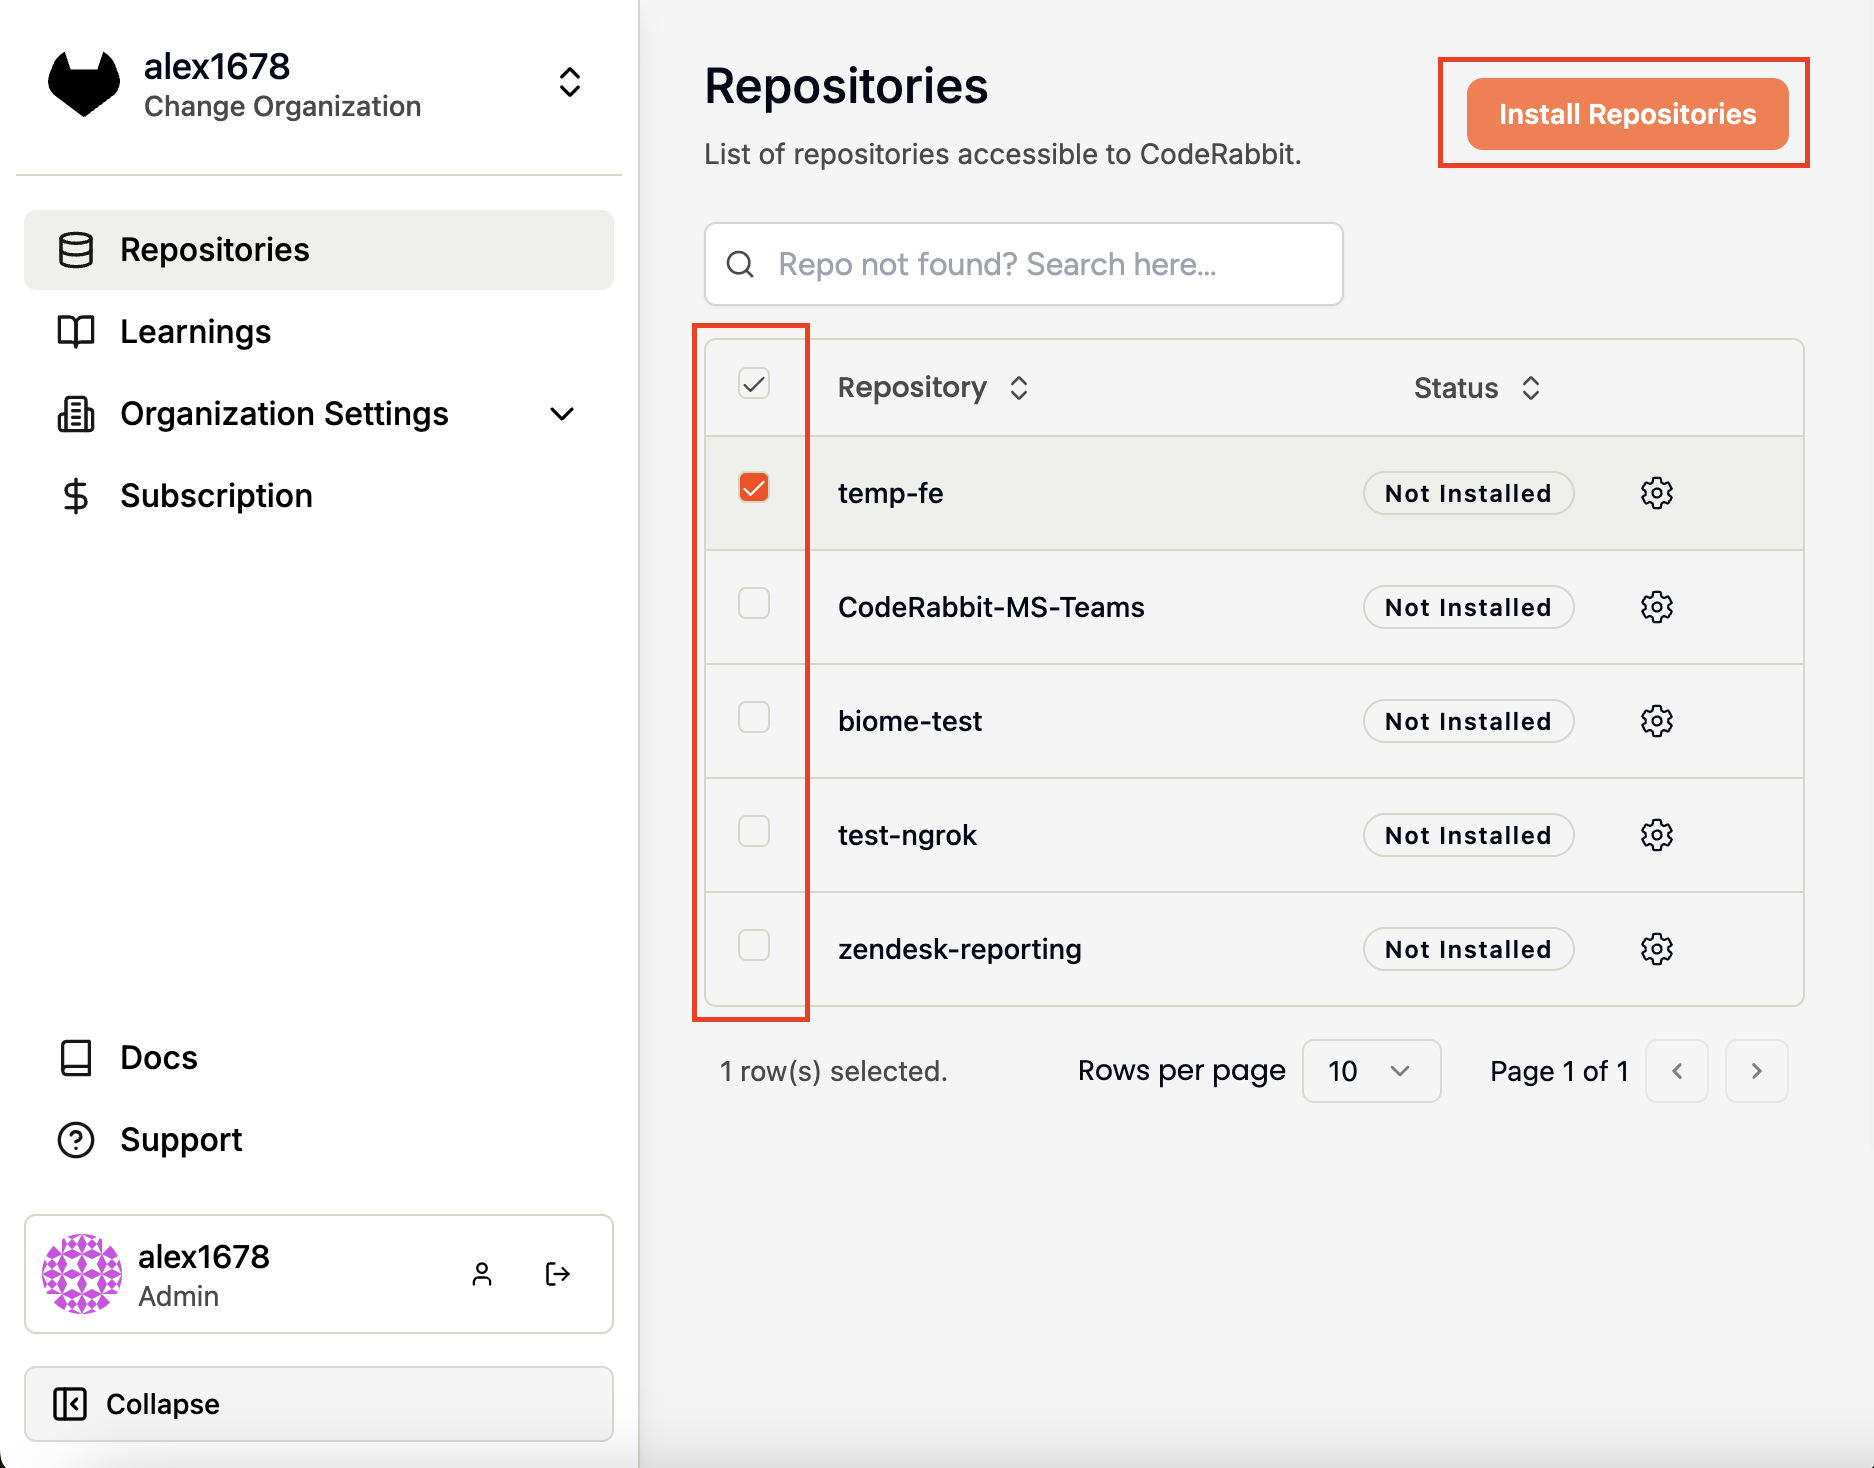
Install CodeRabbit in your repositories
Once your API token is configured, you can install CodeRabbit in your Bitbucket repositories.1
Access repository settings
Navigate to the Repositories
page in the CodeRabbit
app.
2
Select repositories
- Check the boxes next to specific repositories where you want to install CodeRabbit
- To install on all repositories at once, select the checkbox at the top
3
Install repositories
Click Install Repositories to complete the setup.
Webhook Configuration: The webhook
https://coderabbit.ai/bitbucketHandler will be automatically installed for
the selected projects, enabling CodeRabbit to monitor and review your pull
requests.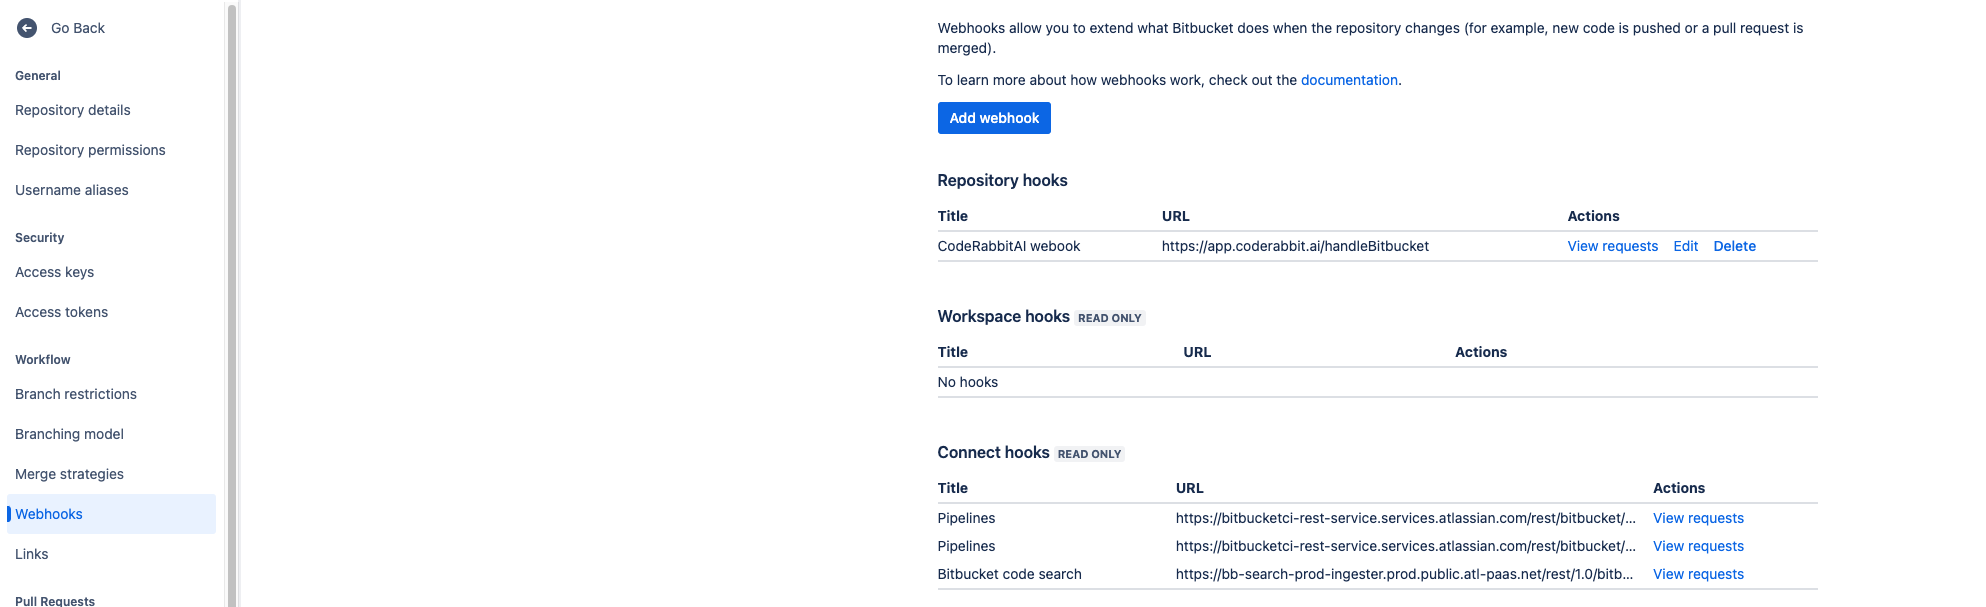
Manual webhook installation
If you install repositories from the Repositories page, CodeRabbit configures the webhook automatically. Use this flow only when you need to install the webhook manually or rotate the shared webhook secret. The Webhook Secret page is available to Bitbucket organizations with organization settings access.1
Open Webhook Secret settings
In the CodeRabbit app, open Account and select Webhook Secret from
the sidebar.
2
Copy the webhook URL
Use the Webhook URL field on that page to copy the exact endpoint that
your Bitbucket Cloud webhook should call.
3
Save or change the webhook secret
Enter the secret that Bitbucket should send with webhook deliveries and
save it in CodeRabbit.
4
Configure the Bitbucket webhook
When creating or editing the webhook in Bitbucket, use the copied webhook
URL and enable these pull request events:
- Opened
- Modified
- Comment Added
If you change an existing webhook secret, CodeRabbit attempts to update
existing CodeRabbit-managed Bitbucket webhooks across installed repositories
automatically and reports how many were updated, skipped, or failed. If a
webhook was created manually, or if an automatic refresh fails, update the
secret directly in Bitbucket.
Configure network access
If your instance requires IP allowlisting, add these CodeRabbit IP addresses to your firewall:Troubleshooting
If you encounter issues during setup or operation, here are common solutions:Webhook Issues
Webhook Issues
If CodeRabbit isn’t accessing repositories or reviewing pull requests:
- Check webhook status in your Bitbucket repository settings
- Manually delete the webhook if it exists but isn’t working
- Refresh the repository page in the CodeRabbit app
- Reinstall the webhook using the CodeRabbit interface
Webhook secret mismatch
Webhook secret mismatch
If manually configured webhooks are rejected after saving or rotating a webhook secret:
- Confirm the webhook secret in Bitbucket matches the value saved on CodeRabbit’s Webhook Secret page
- Update manually created webhooks directly in Bitbucket after rotating the secret
- Review skipped or failed refreshes reported by CodeRabbit and update those repository webhooks directly
Installation Problems
Installation Problems
If you cannot install the webhook:
- Verify permissions: Ensure your Bitbucket service account has the necessary permissions
- Check API token: Confirm the API token is properly configured with all required scopes
- Validate account access: Ensure the service account has developer access to target repositories
Authentication Errors
Authentication Errors
If you’re seeing authentication issues:
- Regenerate API token with the correct scopes
- Update token in CodeRabbit Organization Settings
- Verify service account has workspace membership
For additional support, visit the support page.